Planting grass is one of the best ways to enhance the beauty and functionality of your outdoor space. A lush, green lawn not only improves the aesthetic appeal of your yard but also provides a soft, usable surface for outdoor activities. However, achieving a healthy and vibrant lawn requires careful preparation of the ground and soil. Properly preparing the soil ensures that grass seeds or sod have the best possible conditions for germination, root development, and sustained growth. In this detailed guide, we will walk through each step of preparing the ground and soil for planting grass, from site assessment to final preparation before planting.


Step 1: Assessing the Site
Before you begin preparing the ground for planting grass, it’s essential to assess the site to determine the best approach for soil preparation and grass selection. Consider the following factors:
1. Sunlight Exposure
Different grass species have varying sunlight requirements. Some grass types thrive in full sun, while others are more suited to partial shade. Observing how much sunlight your lawn receives will help you choose the right grass variety. For instance, warm-season grasses like Bermuda and Zoysia prefer full sun, while cool-season grasses like Fescue and Ryegrass can tolerate some shade.
2. Drainage
Proper drainage is critical to lawn health. Check for areas in your yard where water tends to pool or collect. Poor drainage can lead to waterlogged soil, which promotes disease and root rot. If you notice low spots or compacted soil, you may need to address these issues before planting.
3. Existing Vegetation
Examine the existing vegetation in the area where you plan to plant grass. If the site is overrun with weeds, rocks, or undesirable plants, you’ll need to clear the area and potentially treat it to prevent weed regrowth.
Step 2: Clearing the Area
To give your grass the best chance of success, you need to start with a clean slate. Removing all existing vegetation, debris, and obstacles will allow you to properly prepare the soil and ensure even seed or sod placement.
1. Remove Weeds and Vegetation
The first step is to eliminate any weeds, grass, or plants currently growing in the area. You can do this in several ways:
- Manual Removal: For small areas, you can pull weeds by hand, using a garden hoe or shovel to remove as much of the root system as possible.
- Herbicides: For larger areas or tough perennial weeds, you may need to apply a non-selective herbicide. Be sure to follow the manufacturer’s instructions and wait the recommended time before planting.
- Solarization: An organic method involves covering the ground with clear plastic for several weeks to kill weeds through heat exposure. This method works best in hot, sunny climates.
2. Clear Debris and Rocks
Remove rocks, sticks, and other debris that may interfere with planting. Large rocks or stones can hinder root growth and make mowing difficult.
Step 3: Soil Testing and Amendment
Healthy grass requires nutrient-rich soil with good structure and drainage. Conducting a soil test is crucial for determining your soil’s pH level and nutrient content. Soil testing kits are available at garden centers, or you can send a sample to a local agricultural extension office for analysis. The test will help you identify any deficiencies in nitrogen, phosphorus, potassium, and other essential nutrients.
1. Adjusting Soil pH
Grass grows best in soil with a pH between 6.0 and 7.0. If your soil is too acidic (below 6.0), you can raise the pH by adding lime. On the other hand, if the soil is too alkaline (above 7.0), you can lower the pH by applying sulfur or organic matter like compost or peat moss.
2. Adding Organic Matter
Incorporating organic matter into the soil improves its structure, drainage, and nutrient-holding capacity. Compost, aged manure, and leaf mold are excellent options for enhancing soil fertility and texture. Spread a 1- to 2-inch layer of organic matter over the area and work it into the top 4 to 6 inches of soil.
3. Fertilization
Based on the results of your soil test, you may need to apply a starter fertilizer to provide essential nutrients. Look for a fertilizer that contains nitrogen (N), phosphorus (P), and potassium (K) in a ratio appropriate for your soil needs. Phosphorus is particularly important for new lawns as it promotes root growth. Be cautious not to over-fertilize, as too much nitrogen can burn grass seedlings.
Step 4: Tilling and Grading
Once the soil is amended, it’s time to till and grade the area. This step helps create a smooth, even surface for planting and ensures good root penetration for your grass.
1. Tilling the Soil
Tilling loosens the soil and helps incorporate organic matter and amendments more thoroughly. Use a rototiller to break up compacted soil to a depth of 4 to 6 inches. In smaller areas, you can use a garden fork or shovel. Be mindful not to over-till, as excessive tilling can disrupt the soil structure and lead to compaction over time.
2. Grading the Site
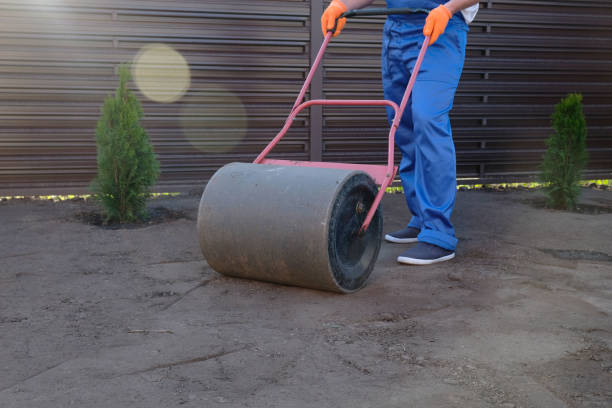
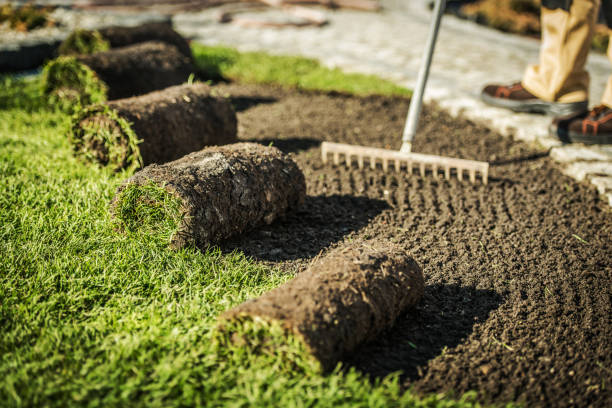
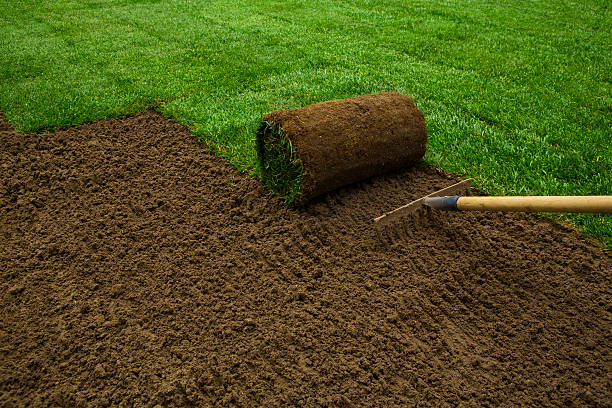
Grading is essential to ensure proper water drainage and to prevent low spots where water can pool. Use a rake or a leveling tool to create a gentle slope away from buildings and other structures, allowing water to flow away from the area. For large areas, you may need to rent a lawn roller to smooth out the surface and ensure even grading.
Step 5: Final Preparation Before Planting
With the soil tilled, graded, and amended, the ground is almost ready for planting. The final steps involve compacting the soil, watering the area, and choosing the best planting method.
1. Compacting the Soil
While you don’t want the soil to be too compacted, lightly compacting it with a roller helps eliminate air pockets and creates a firm seedbed for grass. After rolling, the soil should feel firm underfoot but not hard. If you over-compact the soil, lightly rake the surface to loosen the top layer.
2. Watering the Soil
Before planting grass seed or laying sod, water the area lightly to ensure the soil is evenly moist but not waterlogged. Moist soil promotes better seed-to-soil contact and helps newly laid sod establish its roots quickly. Avoid watering too much, as soggy soil can cause seeds to rot or prevent the sod from rooting properly.
Step 6: Planting Grass Seed or Sod
With the soil fully prepared, you are now ready to plant grass. You can either plant grass seed or lay sod, depending on your preference, climate, and how quickly you want to establish your lawn.
1. Planting Grass Seed
- Choose the Right Grass Seed: Select a grass variety that is suited to your climate and soil conditions. Cool-season grasses, such as Kentucky Bluegrass and Fescue, are ideal for northern regions, while warm-season grasses like Bermuda and St. Augustine are better for southern climates.
- Spread the Seed: Use a broadcast spreader to distribute the seed evenly over the prepared soil. For even coverage, walk in one direction while spreading, then go over the area again at a 90-degree angle. Lightly rake the soil to ensure the seeds are covered, but do not bury them too deeply.
- Watering: After seeding, water the area gently but thoroughly. Keep the soil consistently moist by watering lightly each day until the seeds germinate, which typically takes 7 to 21 days depending on the grass species.
2. Laying Sod
- Choose Quality Sod: Purchase fresh, healthy sod from a reputable supplier. Sod should be green, moist, and free of weeds or pests.
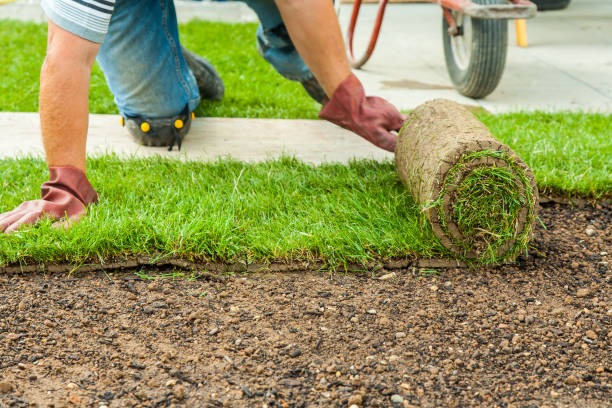
- Lay the Sod: Begin by laying the sod along the straightest edge of your lawn, such as a driveway or sidewalk. Stagger the seams in a brick-like pattern to prevent erosion. Press each piece firmly into place to ensure good soil contact.
- Watering: Water the newly laid sod immediately after installation and continue watering regularly until the sod is well-rooted. After the first week, reduce watering to 2-3 times per week.
Conclusion
Preparing the ground and soil for planting grass is a crucial step in establishing a healthy, long-lasting lawn. By carefully assessing your site, clearing the area, testing and amending the soil, and grading the surface, you can create the perfect foundation for your grass to thrive. Whether you choose to plant grass seed or lay sod, taking the time to properly prepare the ground will pay off with a lush, green lawn that enhances the beauty of your home and provides a welcoming outdoor space for years to come.


